How to Stamp Concrete – Boston Concrete Floor Coatings

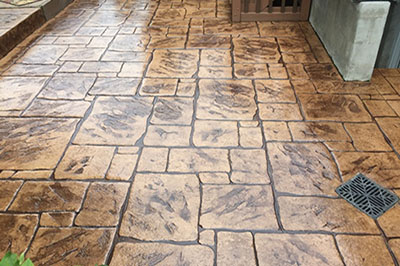
Concrete stamping is the process of using rubber profile stamps to create an appearance of natural brick, stone or slate patterns to freshly poured concrete. It is colored with powdered hardeners broadcast over the wet concrete which also serves to prevent the stamps from sticking to the concrete.
 Popular uses include pool decks, patios, sidewalks and driveways.
8 Steps to Successfully Stamping Concrete
- Look for a color that would complement and works well with your current landscape. Always plan ahead by making sure you have the right design and right style.
- Mix the color. There are two basic procedures when mixing colors for concrete stamping, these are:
- Broadcast method. Color is mixed to the freshly poured concrete.
- Integral Color. Color is poured into the ready mix truck. This procedure will combine the concrete mix and color before it is used.
- Apply the broadcast color hardener with a wide sweeping arm movement to cover as much concrete as possible with each throw. The process is repeated for coloring the entire slab.
- Mix the release agent. Apply release agent to the concrete. Stamping mats will stick to the concrete without the use of a color release agent. Choose the color agent that would complement the design such as red for brick or brown for natural stone.
- During texturing, great force is not necessary. Timing is very important, so each step of the process should be time-sensitive. Inspect the area from time to time so that a touch-up can be done where necessary as soon as possible.
- Make sure you have enough workforce to assist you finish the job. Again work needs to be done immediately to avoid unsuccessful stamping before concrete coatings starts to harden.
- After the concrete had initially set, approximately 24 hours, use high-powered pressure washer to remove excess release agent from the surface of the concrete. Be careful not to damage the concrete. Pressure spray so that release agent will remain in grout lines. This results in a natural and aged effect.
Once the process is complete apply a clear seal coat for protection. It is recommended that a new seal coat is applied every few years.
Latest posts by Ed Winslow (see all)
- Urethane Cement Installation in South Boston at Stavis Seafood - March 14, 2024
- Metal and Steel Deck Coatings for Woods Hole to Martha’s Vineyard MA Ferry - February 22, 2024
- Industrial Epoxy Floor and Urethane Installation Wakefield, Ma - May 16, 2023
